
当サイトでは実際に購入した商品のみをレビューし、アフェリエイトリンク付きでご紹介しています
独自コントラクトNFTの作り方
フルオンチェーンNFTの作成を目指し、勉強の記録をまとめます。
この記事では、独自コントラクトNFTのミントに挑戦です。
この記事でわかること
テストネットワークで独自コントラクトNFTをミントする
目次
はじめに
前回、開発用ウォレットを作成しました。
あわせて読みたい

【フルオンチェーンNFT】開発用ウォレットとテスト用ETHの入手
この記事では、フルオンチェーンNFTの作成を目指し、勉強の記録をまとめます。 この記事でわかること ウォレットにテストネットワークを表示する ウォレットへ開発用 …
今回の目標はこちら!
- 画像をHTTPサーバーに置く
- 独自コントラクトで、テストネットワークへミント
- OpenSea(テストネットワーク)に表示する
フルオンチェーンNFTの前に、独自コントラクトNFTに挑戦してみます。
参考にさせていただいたサイトはこちらです。

一部手順を変更しています
画像データをGithubへアップロード
まず、独自コントラクトから参照する画像とJSONファイルを用意します。
Githubの環境準備は、こちらの記事がわかりやすいです
Qiita
【初めての Github 】その1 アカウント作成~リポジトリ作成 – Qiita
・はじめに# 先日GitHubでソースを公開しようと、人生で初めて GitHub に登録しました。 今後Githubを活用しようと考えている人のために3回に分けて私の体験談(操作手順…
実際の環境はこちらです。
GitHub
GitHub – classynode/test-contract: テストコントラクトのメタデータ保管用
テストコントラクトのメタデータ保管用. Contribute to classynode/test-contract development by creating an account on GitHub.
メタデータは以下のようなJSONファイルを用意します。
imageは、自分の画像PATHを記載します。
{
  "tokenId": "0",
  "name": "test 0",
  "description": "test NFT MetaDeta",
  "image": "https://raw.githubusercontent.com/classynode/test-contract/master/image/0.jpg"
}
独自コントラクトをミントする
ここからは、MetaMaskに接続できるChromeブラウザで作業しよう!🦊
OpenZeppelinのContracts Wizardでコントラクトを作る
あわせて読みたい
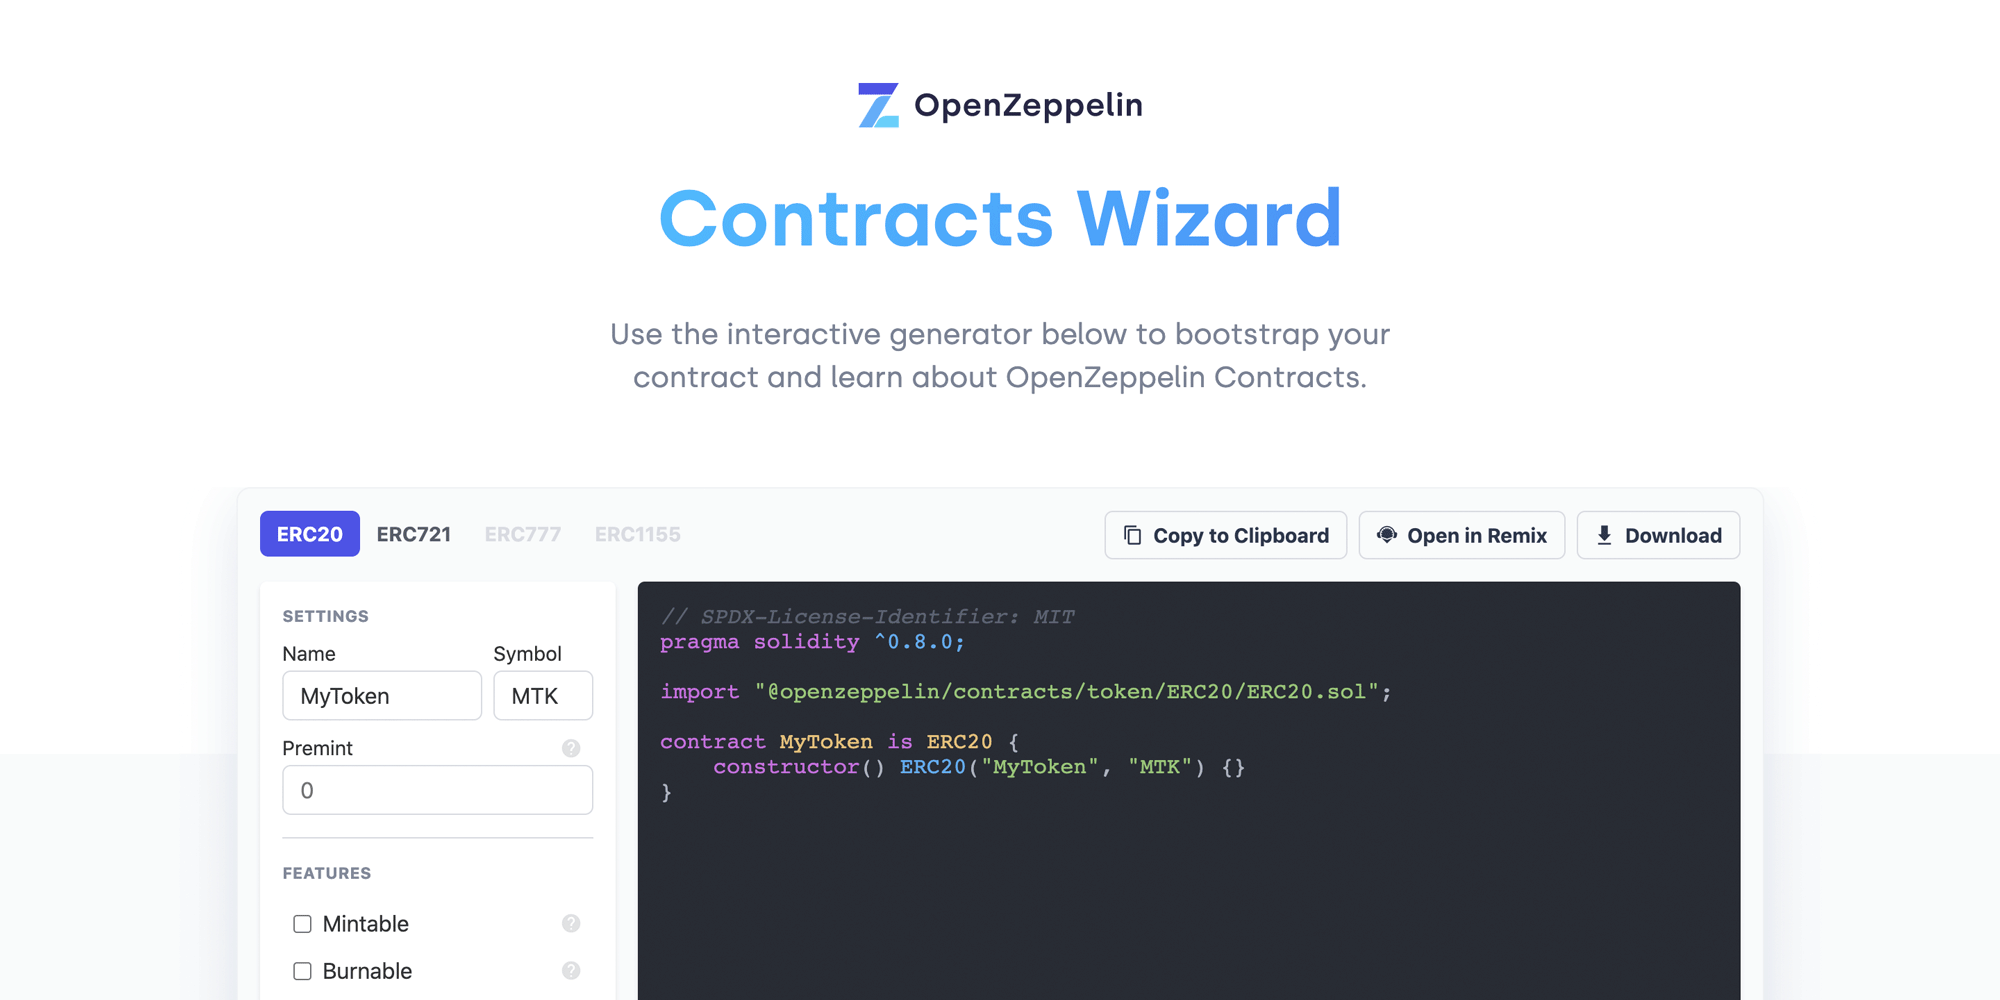
OpenZeppelin Contracts Wizard
An interactive smart contract generator based on OpenZeppelin Contracts.
STEP
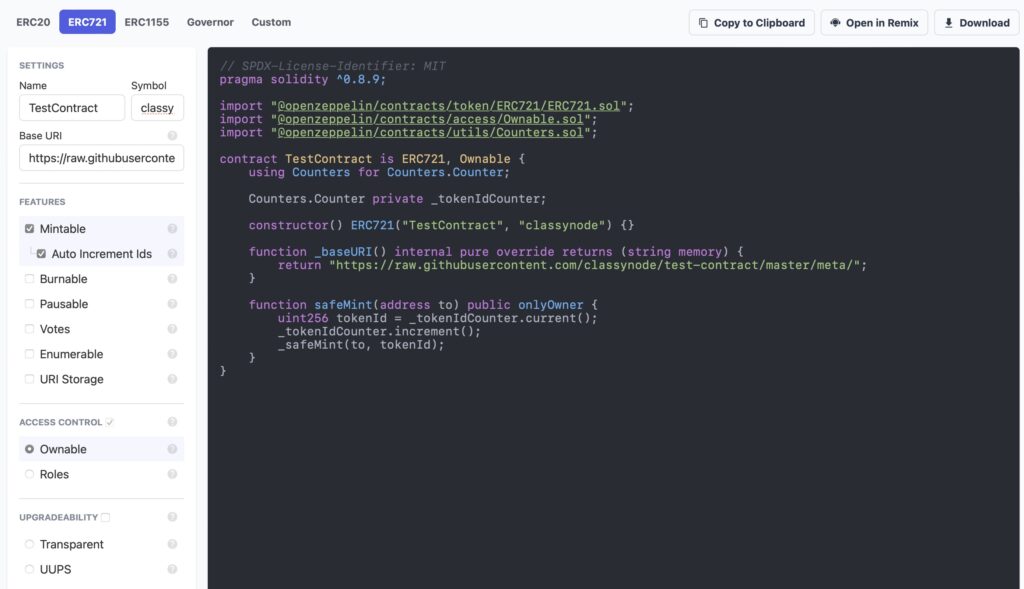
ERC721を選択
STEP
Name, Symbolは自由に入力する
STEP
BaseURIは、Githubに用意したメタデータのPATHを入力
STEP
MitableとAuto Increment Idsのチェックを入れる
Remixでコンパイル、デプロイする
STEP
Contracts Wizardの右上にある「Open in Remix」をクリック
新しいタブが開きます。
STEP
上から3つ目のメニューを開き、「Compile contract」をクリック
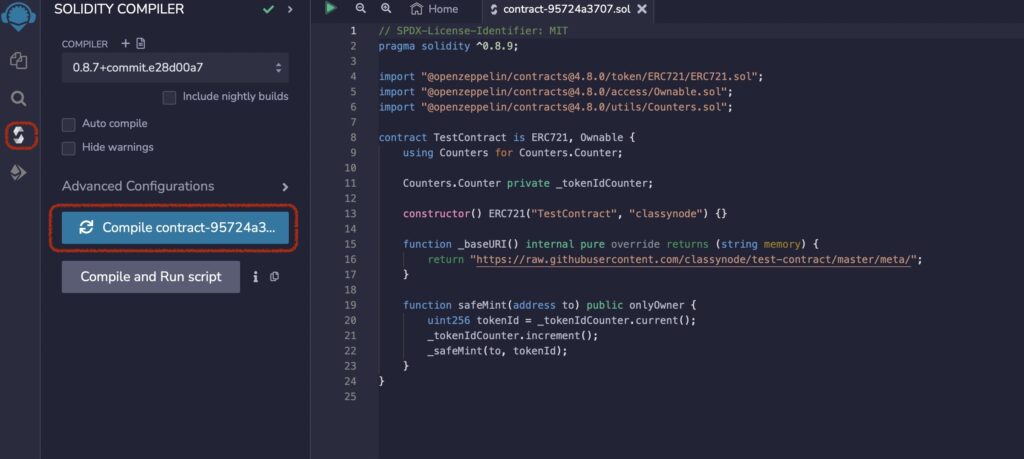
コンパイルに成功すると、上から3つ目のメニューに緑色のチェックマークがつきます。
STEP
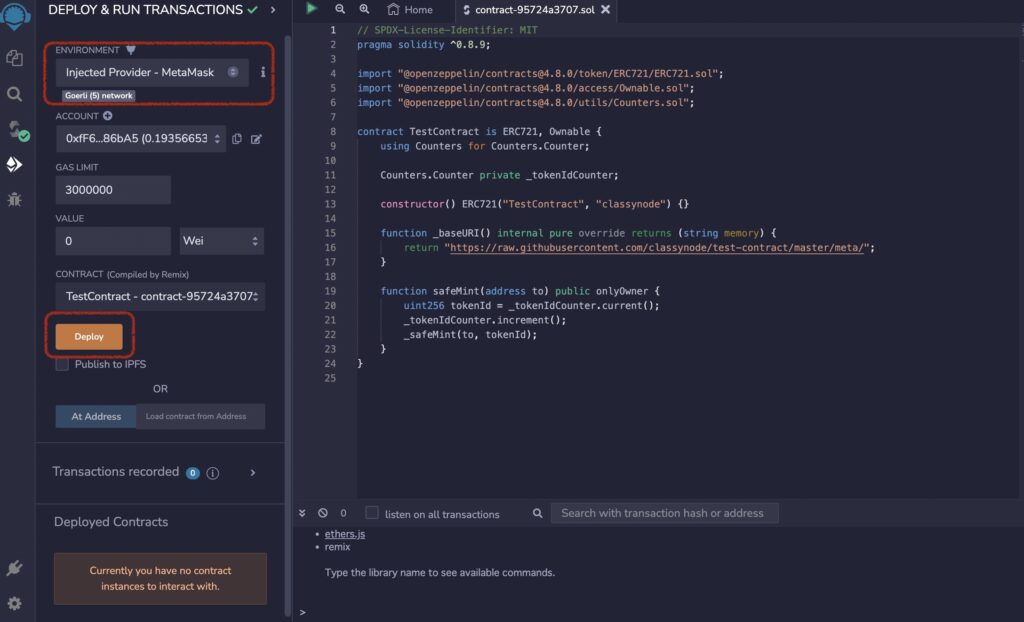
上から4つ目のメニューを開き、「Injected Provider -MetaMask」を選択して、「Deploy」
STEP
Developed Contractの中にある、safeMintに自分の開発用ウォレットアドレスを入力し、「SafeMint」をクリック
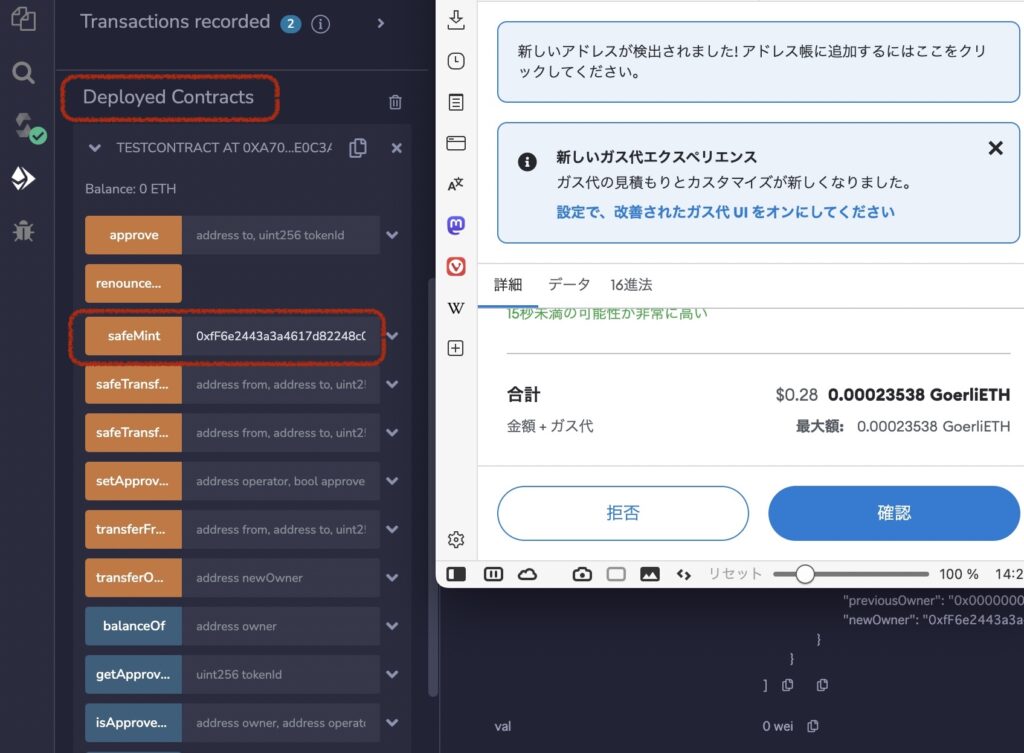
STEP
ウォレット画面が開き、ガス代の確認画面で「確認」をクリック
これでミントできました!
OpenSeaのテストネットワークで動作確認
じゃーん!できました!✨
やったー!
まとめ
独自コントラクトのNFTをテストネットワークにミントすることができました。
次は、SVGデータの作成をまとめたいと思います。
最後まで読んでいただきありがとうございました。
みなさまの暮らしがより良くなりますように。