
当サイトでは実際に購入した商品のみをレビューし、アフェリエイトリンク付きでご紹介しています
SWELL導入時に行う最初の設定(アナリティクス・サーチコンソールなど)
SWELLへの移行を予定している方に向けて、導入時に行う最初の設定をまとめました。

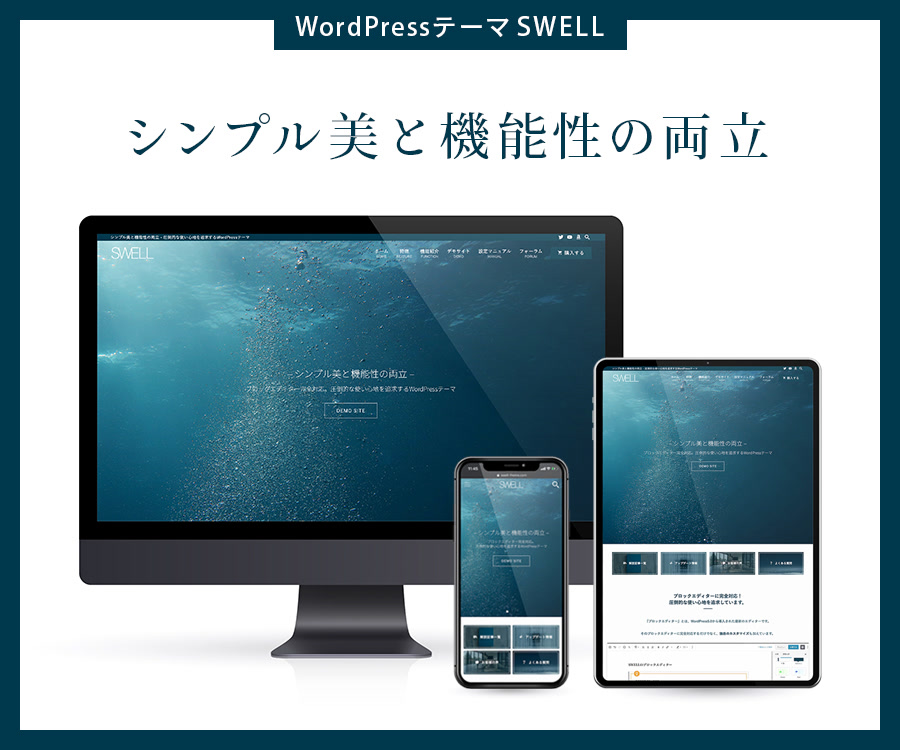
先日、WordPressテーマをCocoonからSWELLに移行しました。
移行プラグインを導入すると、記事はほぼ問題なく表示できるかと思います。
アナリティクスやOGPの設定は、移行プラグインでは反映されません。
別途設定が必要です。
この記事でわかること
- SWELLでのGoogleアナリティクスの設定方法
- SWELLでのGoogleサーチコンソールの設定方法
- SWELLでのOGP設定方法
- XMLサイトマップの設定方法
SWELLのインストール方法を知りたい方は、こちらをご覧ください。
SWELL導入の手順はこちら

【カンタン!3STEP】CocoonからSWELLへの移行手順【乗り換え】
WordPressテーマを、CocoonからSWELLに移行しました。 移行手順は、大きく分けて「1. 検討 → 2. 購入 → 3. 切り替え」の3STEPです。 この記事では、乗り換えのポイ…
目次
SEO SIMPLE PACKプラグインの導入

SWELLでGoogleアナリティクスやサーチコンソールを使いたい場合は、「SEO SIMPLE PACK」プラグインをインストールします。
「SEO SIMPLE PACK」は、SWELLテーマと同じ株式会社LOOSが開発しています。
テーマとの相性も、安心です。
Googleアナリティクスを設定する
Googleアナリティクスを利用したい場合は、必須の設定です。
プラグインを有効化すると、WordPress管理画面に「SEOPACK」というメニューが追加されます。
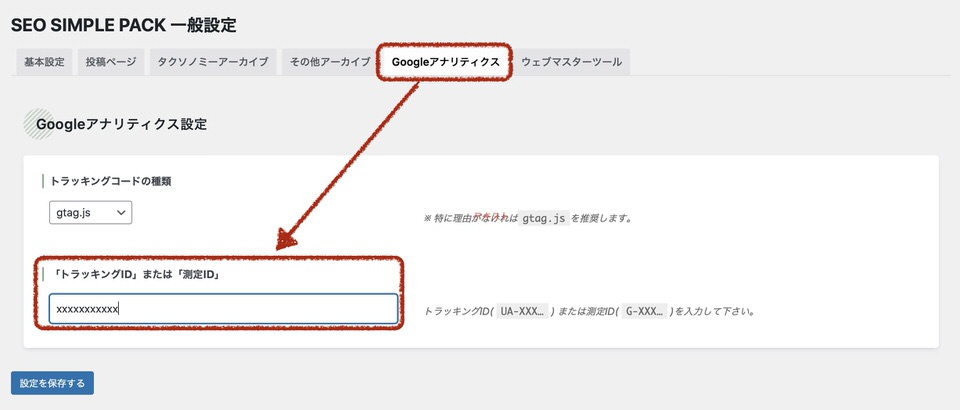
下記の手順で、トラッキングIDを設定してください。
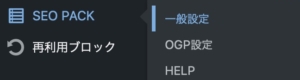
- 「SEO PACK」→「一般設定」をクリック
- 「Googleアナリティクス設定」タブを開く
- 「トラッキングID」または「測定ID」を入力
Googleサーチコンソールを設定する
サーチコンソールを「ドメインプロパティ」で設定している場合、この設定は不要です。
この項目は飛ばして、次へ進んでください。
Googleサーチコンソールを「URLプレフィックス」で使っている場合は、下記の設定が必要です。
- 「SEO PACK」→「一般設定」をクリック
- 「ウェブマスターツール」タブをクリック
- 「Googleサーチコンソールの認証コード」を入力
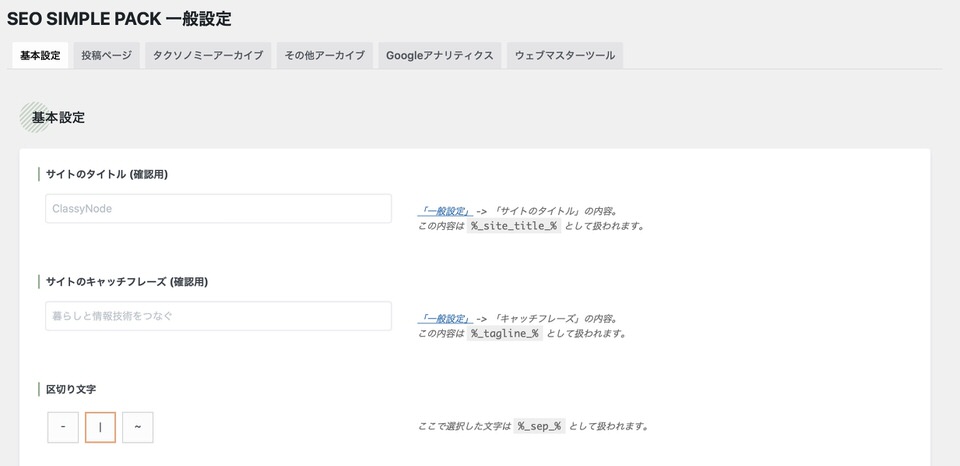
検索結果に表示される説明文を設定する(discription)
GoogleやYahoo!の検索結果に表示される説明文を設定します。
- 「SEO PACK」→「一般設定」をクリック
- 「基本設定」タブをクリック
- 「フロントページ」のディスクリプション・キーワードを入力
- 「設定を保存する」をクリック
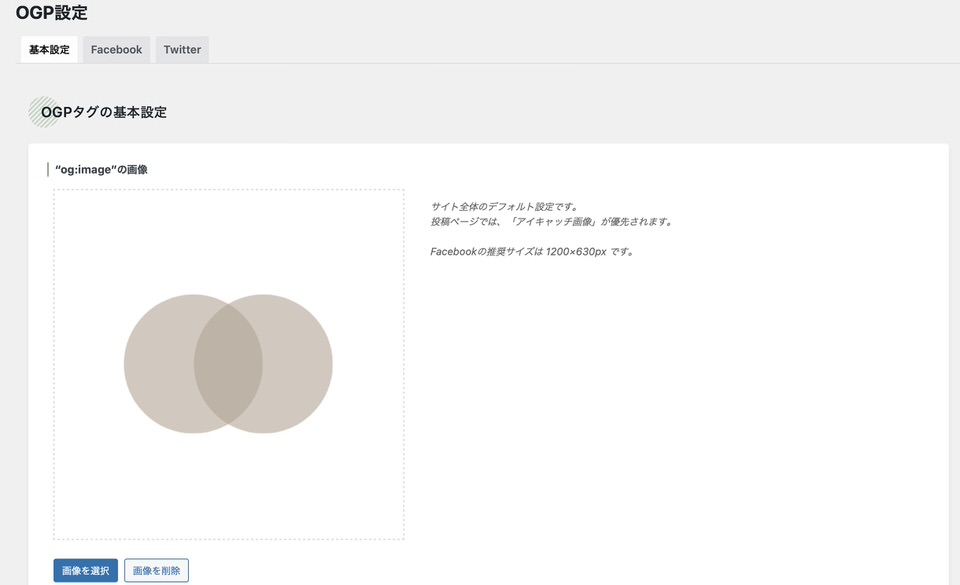
SNSでトップページの画像が表示されるように設定する(OGP)
TwitterやFacebookにリンクを貼ったときに、画像が表示されるようOGP(Open Graph Protocol)を設定します。
- 「SEO PACK」→「OGP設定」をクリック
- 「基本設定」タブをクリック
- 「画像を選択」をクリック
- 表示したい画像を選んで、「選択」をクリック
トップページへのリンクを貼ってみると…
できました!
ClassyNode

ClassyNode | Bridging Everyday Life and Information Technology.
生活に情報技術を取り入れて、より快適な暮らしを目指します。スマートホームや、便利なツールの活用方法を発信します。

XML Sitemapsプラグインの導入
WordPress.org 日本語

XML Sitemap & Google News
Take control of your WordPress core XML Sitemap and add a Google News Sitemap.
Googleの検索結果に表示されるようにするためには、検索ロボット🤖に自分の記事を認識してもらう必要があります。
🤖用の地図を作成するために、「XML Sitemap & Google News」プラグインをインストールし、有効化します。
GoogleサーチコンソールでサイトマップURLを指定する
作ったサイトマップの在り処をを検索ロボット🤖に伝え、定期的に訪問してもらいます。
- Googleサーチコンソールにログイン
- 「サイトマップ」をクリック
- 「https://自分のドメイン/sitemap.xml」を入力
- 「送信」をクリック

これでGoogleの🤖が、自分のサイトマップを見に来てくれるようになりました!
まとめ
アナリティクスや、サーチコンソールの基本設定を終えることができました。
ここからは、見た目をカスタマイズしたり、既存の記事をのんびり再編集します。
見出しの文字色のカスタマイズ方法は、こちらの記事をお読みください。
あわせて読みたい
【SWELL】見出しの文字色をカスタマイズする
SWELL標準では、見出しやカテゴリが白文字です。淡い背景色だと読みづらいため、CSSで文字色をカスタマイズしてみました。 SWELLを使い始めたら、まずはサイトのメイ…
わたしが好きなSWELLの標準機能を、以下の記事にまとめました。
よければ、こちらもご覧ください。
あわせて読みたい
【SWELL】オススメの標準機能5選
2021年春にSWELLを導入し、半年が経ちました。 これからSWELLを購入する方に向けて、わたしが特に好きな機能5つをご紹介します。 この記事でわかること SWELL標準で…
最後まで読んでいただき、ありがとうございました。
みなさまの暮らしがより良くなりますように。
アイキャッチに使用したSWELLアイコンは、開発元の許可をいただき、ダウンロードしたテーマから引用させていただきました。